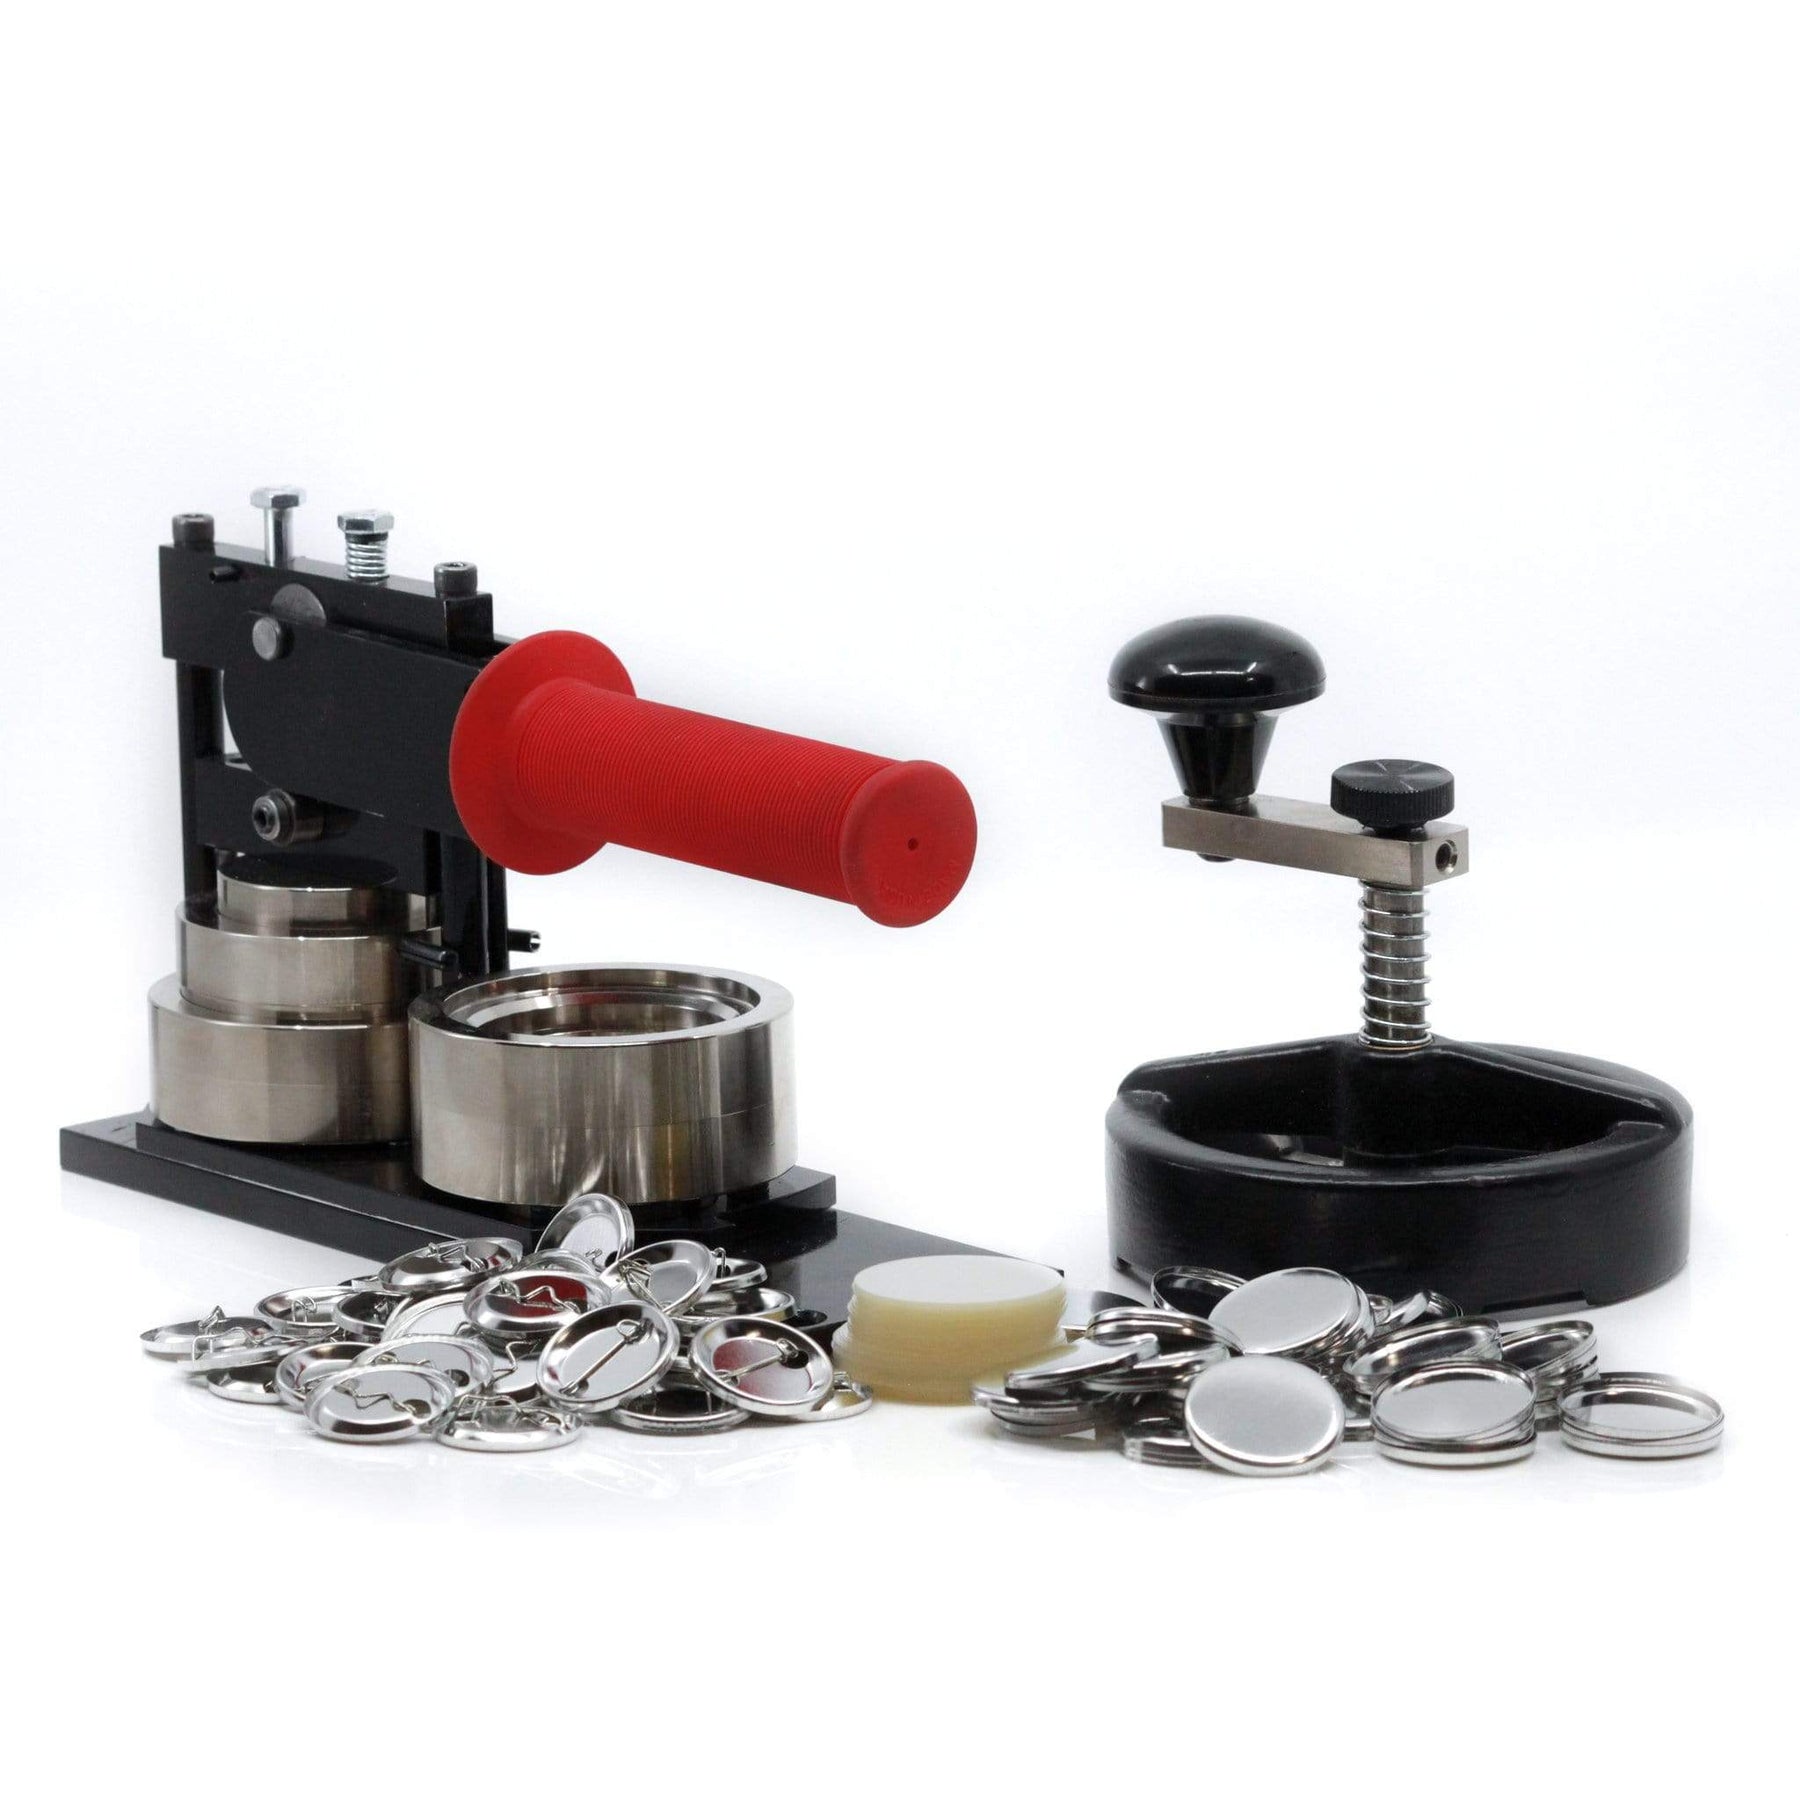
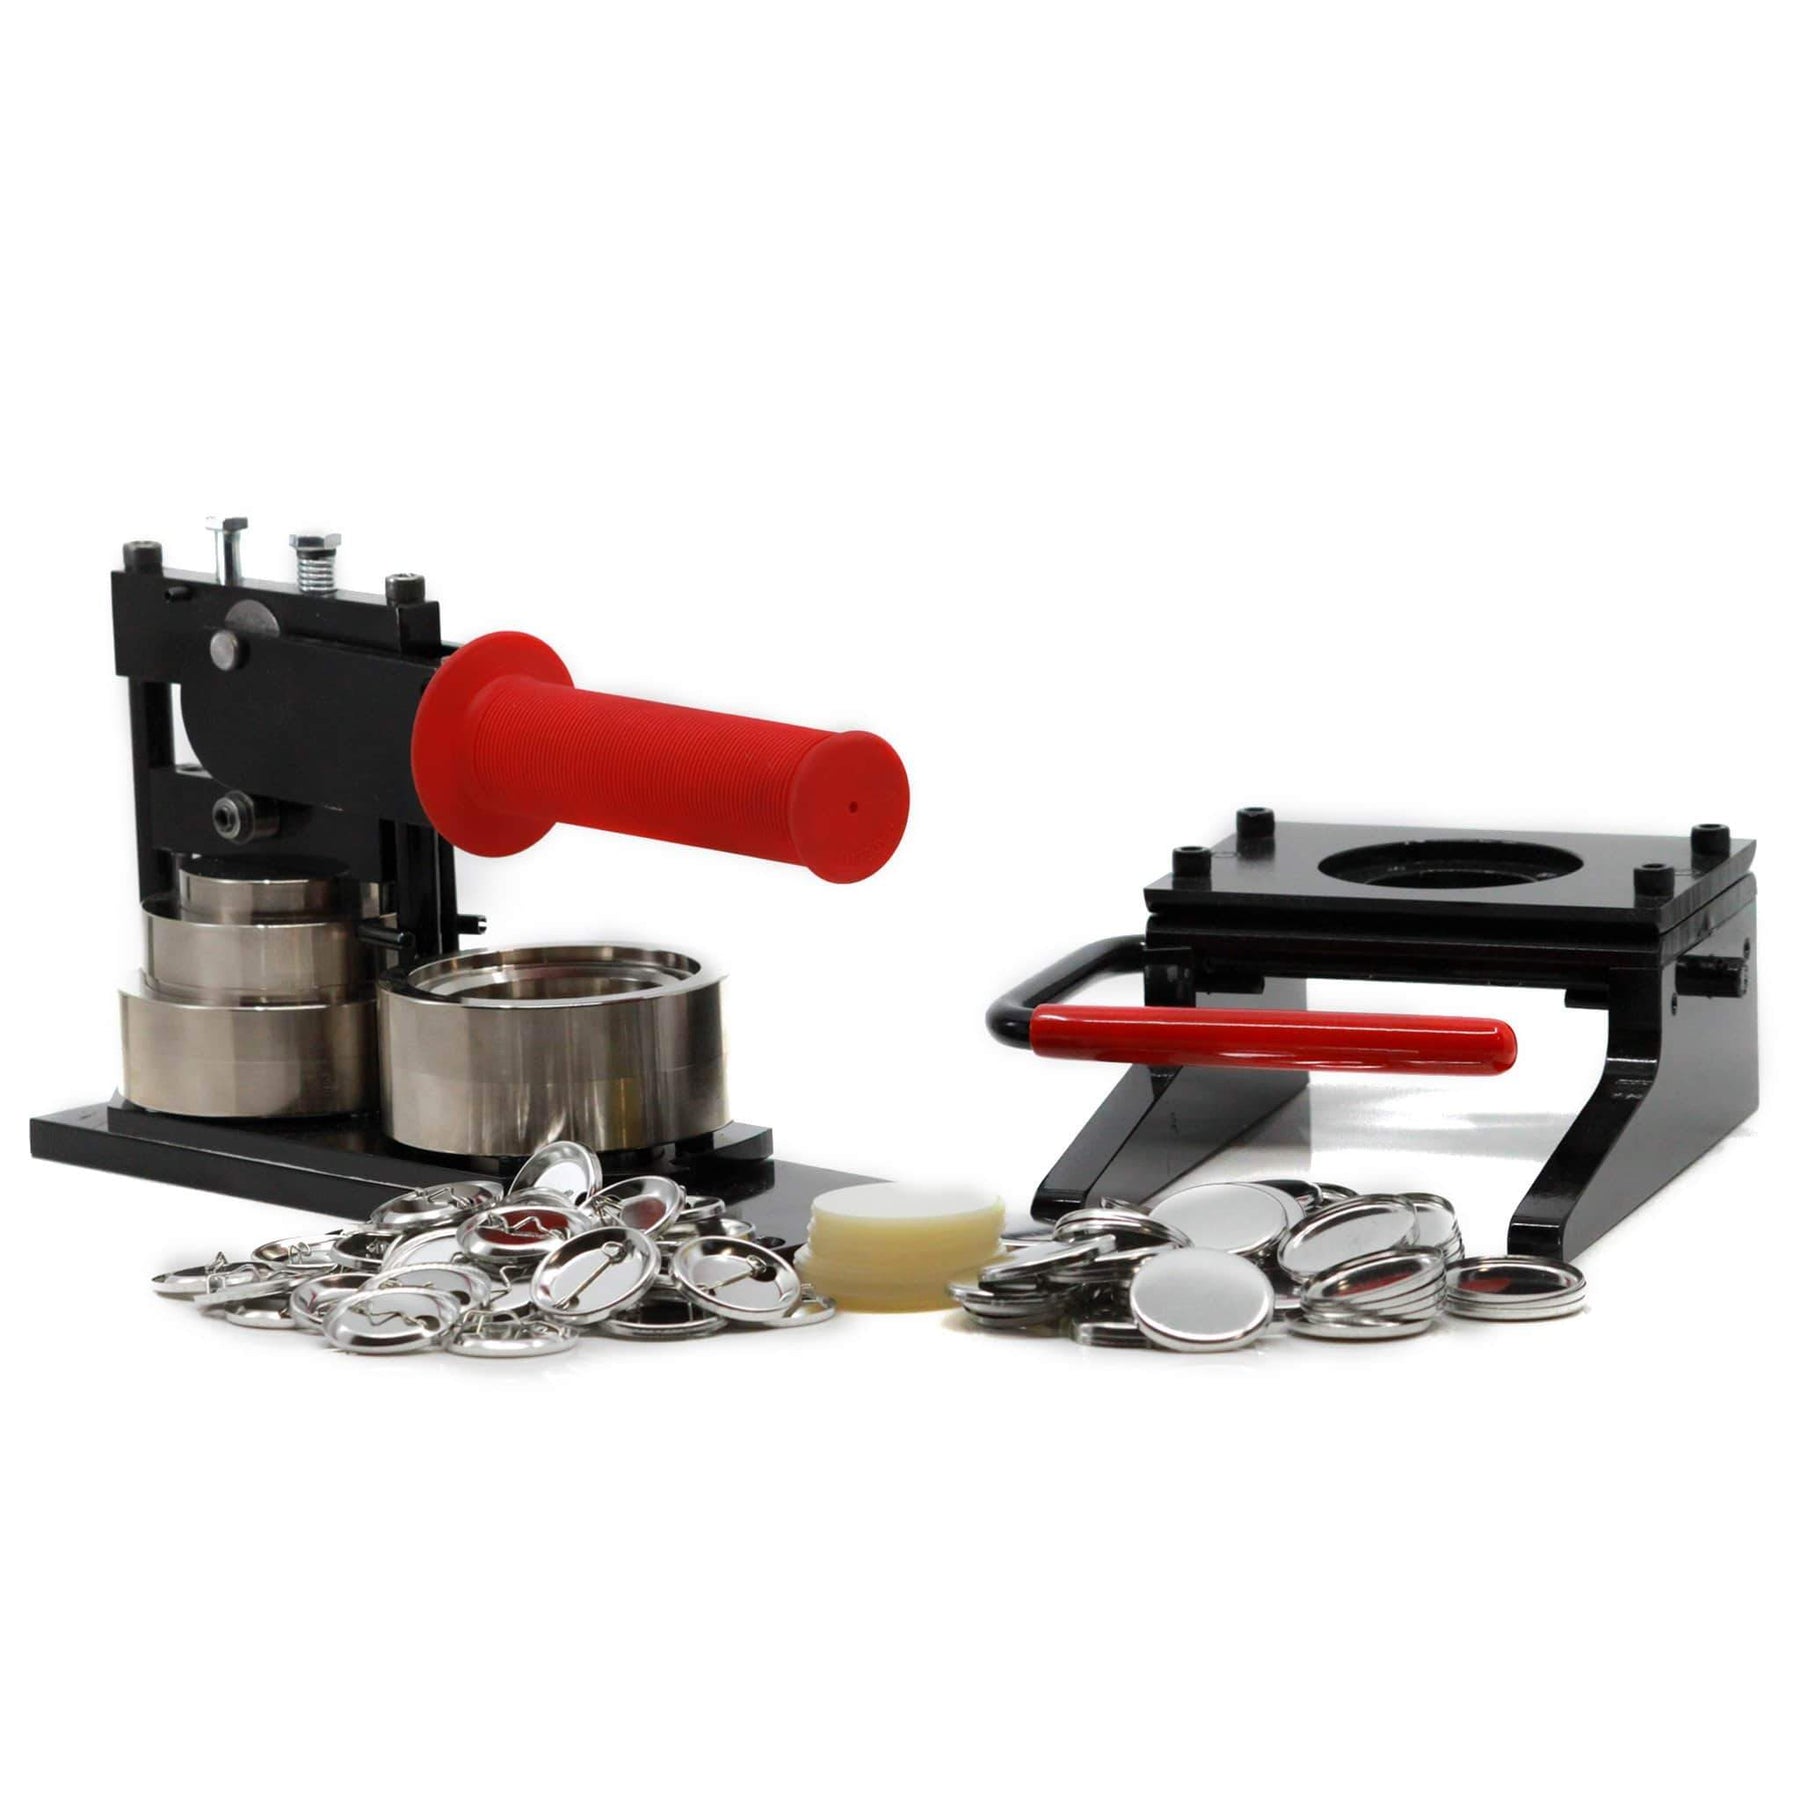
If you've ever struggled to make buttons with one of the inexpensive Badge-A-Minit button machines, you are in for a very pleasant surprise the first time you make buttons with our Mini-Magic button machine.
That's because the Mini-Magic is so easy to use!
To make a button with the Mini-Magic, simply place your artwork and button-making supplies into the machine, pull the handle down twice, and your button is made.
One feature customers like about our Mini-Magic 1-1/4" compared with our Model 100 1-inch, is that the pin is already inserted into the button back. So you don't have to take time inserting the pin after the button is made. This can be a real time saver for you.
It really is that easy to make buttons with the Mini-Magic.
(To see a short video of a six year old operating one of our button machines, click here)
Make buttons anytime / anywhere
Since it doesn't require electricity and is small enough to fit in a child's lunch box, you can take your Mini-Magic with you and make buttons where ever you happen to be.
Rugged dependability
Unlike the inexpensive Badge-A-Minit button machines that are made of plastic (or a plastic-like compound), the Mini-Magic is made of solid-steel. And while it's obvious that steel is a more durable material than plastic, button machines that have steel dies also make better quality buttons, since the machine has to bend and form the parts that are themselves made of steel.
How buttons are made
Let's take a look and see what takes place when a button is made.
To begin, the button design and mylar covering are pulled taut over the face of the button and the excess artwork and mylar are tucked up underneath the front of the button, in much the same way your sheets are tucked up under the mattress when you make a bed. The back of the button is then pressed into the front and the edge of the button is crimped. It is this crimping action that holds the button together.
Why steel is better than plastic
Pushing down the handle of your button machine, mechanical energy travels from the muscles in your arm into the button machine. This mechanical energy provides the force that is used to crimp the edge of the button. The Model 150 MS, which is made of solid steel, facilitates the transfer of mechanical energy more efficiently than button machines that are made of plastic or aluminum. And this is why carpenters use hammers that are made of steel... not plastic or aluminum.
Buttons made with the Mini-Magic will have smooth, tightly crimped edges. They won't exhibit the "poor quality issues" that are common to buttons made with plastic button machines; issues like paper and plastic sticking out the sides of the button, buttons that have rough or serrated edges, or buttons that fall apart after being made because the edges weren't tightly crimped.
Creating artwork for your one-inch buttons
If you have a computer (or access to one), creating the designs for your buttons is easy, too!
We now include 90 days of Unlimited Access to our Online Button Design Studio when you purchase the Mini-Magic button machine, so you can design your buttons online, using nothing more than your Internet browser.
You can also use any graphics program to create your designs and print them using any inkjet or laser printer. You don't need to use special paper to make buttons... regular copy paper and inkjet paper works just fine.
You can even cut photos from a magazine and use them to make one-inch buttons!
Circle cutters
Since cutting artwork is such an important part of the button-making process, a discussion about the job circle cutters do will help you better understand the process of how buttons are made and help you choose the cutter best suited for your needs.
We currently offer two types of circle cutters... the AC-1 circle cutter and the Punch Cutter.
For most customers, I recommend the AC-1. It's less expensive than the punch cutter and it can do things the punch cutter cannot.
The AC-1 does its cutting by means of a rotary blade that is safely housed inside the body of the cutter, so it can't cut anything you don't intend to cut.
The blade sits at the end of a cutting arm that is fully adjustable. It is this feature that allows the AC-1 to make the cuts for buttons as small as 1-inch, as large as 3-1/2 inches, and any size in between.
To cut button designs with the AC-1 you simply place the metal cutting plate (that comes with the AC-1) on a table and place your printed artwork on top of the cutting plate. Position the AC-1 over your artwork and center it. Then push down and turn the handle to cut your artwork into a perfect circle.
The AC-1's rotary blade will stay sharp far longer than straight-edged cutting blades (such as those used in Badge-A-Minit's circle cutters). This will not only give you better cuts, it will allow you to cut thousands of designs before you will need to replace the cutting blade.
It is possible to re-sharpen the AC-1's cutting blade, if you wish. To re-sharpen it, simply remove the blade from its adjustment arm (it's held in place with a "C-clip") and run the edge of the blade over a whetstone, just as if you were sharpening a knife.
For customers who prefer not to resharpen their blades, replacement blades are only $6.99 each.
30-Day Money-back Guarantee
You can try the Mini-Magic for a full 30-days without risk or obligation. Then, if for any reason you aren't completely satisfied, simply return it for a full and immediate refund (less shipping).
If you purchase a Badge-A-Minit machine and decide to return it, they will charge you a 10% restocking fee. At Dr. Don's Buttons, we don't charge restocking fees... and we don't need to, because customers who try our button machines seldom ever return them!
And hopefully this will lead you to wonder... if Badge-A-Minit's button machines are so good, why do they charge restocking fees when we don't?

The "Mini-Magic"1-1/4" button-making kit
includes the following:
all this for only
$309.95

